
Outdoor Security Camera Placement Mistakes to Avoid
Key Takeaways
|
Outdoor security cameras can still leave a property vulnerable when they are installed in the wrong locations. Poor height, viewing angles, obstructions, lighting, and environmental exposure can create blind spots, reduce image clarity, and trigger unreliable motion alerts.
This guide covers the most common outdoor security camera placement mistakes and how to avoid them for more reliable property monitoring.
Why Outdoor Security Camera Placement Matters
Outdoor security camera placement determines whether recorded footage provides usable security information or simply shows that activity occurred. The camera’s position controls what enters the frame, how much detail is captured, and how consistently activity can be detected.
A well-positioned camera keeps important areas within its field of view while preserving enough visual detail to distinguish faces, clothing, vehicles, or other identifying features. Positioning also affects motion detection, since activity occurring outside the detection zone or at an ineffective distance may not produce useful alerts.
Lighting conditions add another variable. The direction a camera faces influences exposure during daylight and the performance of night vision after dark. Poor positioning can cause glare, deep shadows, or uneven illumination that obscures details at critical moments.
The goal is not simply to capture the widest possible area. Effective placement balances coverage, detection, and identification, so the footage shows useful details where security events are most likely to occur.
Common Outdoor Security Camera Placement Mistakes
Many placement problems come from maximizing the visible area without considering what the camera actually needs to capture. Height, viewing direction, coverage gaps, and physical obstructions can determine whether an incident remains identifiable on recorded footage.
Is Your Security Camera Mounted Too High?
Mounting an outdoor camera too high can turn useful identification footage into a mostly overhead view. A camera near the roofline may show where someone walked but capture the top of their head instead of facial features, clothing details, or items they are carrying.
The appropriate mounting height depends on the camera’s lens, resolution, viewing distance, and target area. Position it high enough to discourage tampering, but not so high that the downward angle prevents clear identification where people are expected to approach.
Is the Camera Pointed at the Wrong Angle?
A poorly aimed camera can dedicate a large part of its frame to pavement, walls, roof edges, or open sky. This reduces the portion of the image available for monitoring the area where relevant activity actually occurs.
Set the viewing angle around the expected direction of movement. For example, a camera covering a walkway should capture people as they approach rather than only after they have passed beneath it. Check the live view before fixing the mount permanently to confirm the target zone occupies the useful part of the frame.
Are You Leaving Blind Spots Around Entry Points?
Covering the front entrance alone does not provide complete exterior surveillance. Side doors, rear entrances, garage access points, gates, and connecting walkways can become blind spots when the camera layout is designed around only the most obvious doorway.
Map the routes a person could realistically use to approach the property. Cameras should provide complementary coverage across priority access points without relying on one wide-angle view to monitor several areas that require different perspectives.
Can Objects Block the Camera’s View?
A clear view during installation may not remain clear in everyday conditions. Tree branches, shrubs, porch columns, roof overhangs, seasonal decorations, open doors, and regularly parked vehicles can partially or completely obstruct the scene.
Evaluate the camera from its actual mounted position and consider how nearby objects move or change over time. The critical surveillance area should remain visible under normal property conditions, not only when the space is temporarily clear.
Placement Mistakes That Reduce Image and Motion Detection Quality
Even when the target area is correctly framed, environmental conditions can reduce outdoor camera performance. Light direction, nighttime illumination, and background movement directly affect whether footage remains clear and motion alerts correspond to relevant activity.
Pointing Cameras Toward Strong Light Sources
Direct sunlight, vehicle headlights, bright exterior fixtures, and reflective surfaces can create glare or extreme contrast. When the camera compensates for the brightest part of the frame, people or objects in darker areas may appear underexposed and lose identifying detail.
Observe the location at different times of day before finalizing the angle. A small change in direction or mounting position can reduce backlighting without sacrificing coverage of the intended surveillance area.
Ignoring Nighttime Lighting Conditions
A position that produces clear daytime footage may perform differently after sunset. Nearby lights can create uneven exposure, while windows, light-colored walls, and reflective surfaces may bounce infrared illumination toward the lens and cause washed-out areas.
Test the camera under actual nighttime conditions. The monitored zone should receive enough usable illumination for the camera’s night vision system without placing strong light or highly reflective objects directly within its critical viewing path.
Monitoring Too Much Unnecessary Movement
A camera aimed toward a busy road, public sidewalk, moving vegetation, or another high-activity area may generate frequent alerts unrelated to the property. Excessive non-actionable detections can make meaningful notifications harder to recognize and increase unnecessary recorded footage.
Frame the camera around areas where movement has security relevance. When the system supports them, configure motion zones or activity areas to exclude predictable background movement while preserving detection around entrances, paths, and other priority areas.
Security, Weather, and Privacy Mistakes to Avoid For Camera Placement
Some placement mistakes affect more than what appears on camera. Outdoor cameras also need a mounting position that limits tampering, accounts for local weather exposure, and keeps surveillance focused on appropriate areas.
Installing Cameras Within Easy Reach
An accessible security camera can be covered, redirected, disconnected, or damaged before it captures useful footage. The mounting point should therefore discourage physical interference without pushing the camera so high that it loses the viewing perspective required for its intended area.
Consider accessibility from porch railings, fences, exterior stairs, low roofs, and other structures someone could use to reach the device. The final position should balance tamper resistance with practical access for cleaning, inspection, and maintenance.
Protecting Outdoor Cameras From Maryland Weather
Outdoor security cameras in Maryland can encounter rain, snow, summer heat, humidity, freezing conditions, and changing seasonal exposure. Even an outdoor-rated camera can perform poorly when its mounting location repeatedly exposes the lens and housing to moisture, debris, or direct weather.
For homeowners installing outdoor security cameras in Bethesda, MD, sheltered positions beneath suitable eaves, overhangs, or covered exterior areas can reduce direct exposure without compromising the required view.
Check the camera’s IP rating and manufacturer-specified temperature range before installation, since weather resistance varies by model.
Placement should also account for drainage and seasonal changes around the mounting point. Avoid locations where runoff can reach the device or where snow, ice, leaves, and other debris are likely to accumulate around the lens or housing.
Pointing Cameras Into Private Areas
Outdoor cameras should concentrate on areas relevant to the property’s security rather than capturing more neighboring space than necessary. A wide field of view can unintentionally include neighboring windows, private yards, or other areas unrelated to the monitoring purpose.
Adjust the viewing boundary so the camera captures the property and relevant security zones while minimizing unnecessary surveillance beyond them. Where supported, privacy masking can exclude portions of the image that do not need monitoring. Homeowners should also review applicable state and local requirements concerning video and audio recording before finalizing the installation.
How to Choose Better Outdoor Security Camera Locations
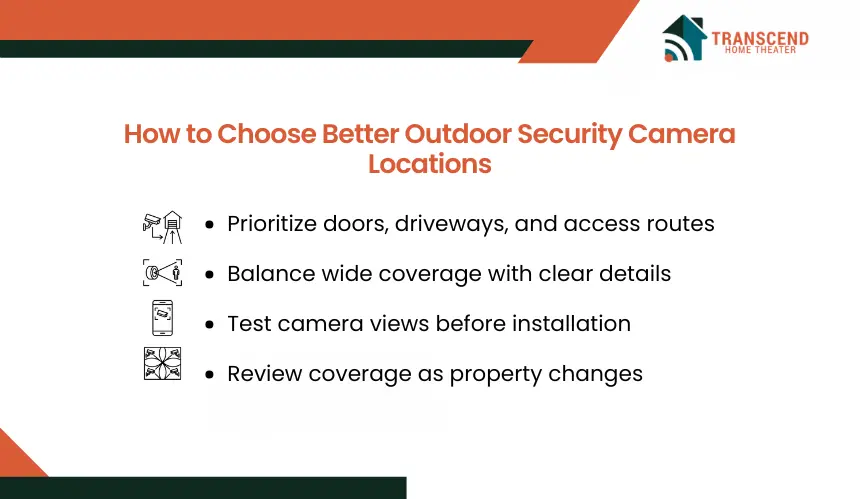
Choosing effective camera locations starts with how people can realistically approach and move around the property. Each position should serve a defined monitoring purpose rather than simply adding another view of the exterior.
1. Prioritize Likely Entry Routes
Start with the routes that lead toward doors, garages, gates, and other access points. Driveways and connecting walkways may also require coverage when they provide a direct approach to the property.
In Bethesda, MD, placement may need extra attention on properties with mature tree cover, deep setbacks, long driveways, side-yard access, or entrances partially screened by landscaping. These conditions can create approach routes that are not fully visible from a camera mounted only at the front door. Position cameras according to the actual path from the street, driveway, or side access toward the home.
Walk these routes from the perspective of someone approaching the home. This makes it easier to identify where a camera can observe movement before a person reaches the protected area rather than capturing activity only after they arrive.
2. Balance Coverage With Identification
A wide field of view is useful for general awareness, but expanding the scene too far can make people and vehicles occupy fewer pixels in the recorded image. A narrower view may provide stronger identifying detail but leave surrounding activity outside the frame.
Match each camera’s viewing distance and field of view to its purpose. Use broader perspectives where situational awareness matters and more focused views where recognizing a person, vehicle, or activity is the priority.
3. Test the View Before Mounting
Before drilling holes or permanently securing the camera, temporarily position it at the proposed location and review real footage. Walk through the monitored area using the same routes visitors would normally take.
Check whether relevant activity stays visible from approach through departure and whether motion detection responds at the distances that matter. Testing first can reveal positioning problems that are difficult to judge from the mounting point alone.
4. Recheck Coverage Over Time
An effective installation can become less effective as the property changes. Growing vegetation, new fencing, exterior renovations, relocated outdoor furniture, and changes to frequently parked vehicles can alter what a camera can monitor.
Review exterior camera views periodically and after significant property changes. Compare the current scene with the original monitoring objective, then adjust the position or detection area when new conditions interfere with useful coverage.
Turn better camera placement into a more connected home security setup. Transcend Home Theater provides smart security systems, smart cameras, and whole-home automation across the Washington, DC Metro Area, including Maryland, Virginia, and Northwest DC. Contact the team to plan a smarter security solution for your home.
Frequently Asked Questions
Should outdoor security cameras be visible or hidden?
Visible cameras usually provide stronger deterrence, while discreet placement prioritizes monitoring without drawing attention. For most homes, a mixed approach works well: keep primary cameras noticeable near entrances and use less obvious secondary views where needed. Concealment should never interfere with the lens, microphone, antenna, maintenance access, or intended detection area.
How strong does Wi-Fi need to be where an outdoor camera is installed?
A wireless camera needs a stable connection at the actual mounting point, not just inside the nearest room. Test live video, notification speed, upload reliability, and reconnection outdoors before installation. Weak coverage can delay alerts or interrupt recordings. Mesh Wi-Fi, an outdoor access point, or a wired PoE connection may provide more reliable connectivity.
Should outdoor security cameras have overlapping coverage?
Wired video doorbells are usually more constrained because placement must account for compatible low-voltage wiring and the existing doorbell circuit. Battery-powered models provide greater mounting flexibility because they do not require the same electrical connection. However, wireless placement still needs dependable Wi-Fi coverage and convenient access for periodic charging or battery replacement.
Can outdoor security cameras record audio in Maryland?
Maryland treats audio recording more cautiously than video. State law generally requires prior consent from all parties when a private oral communication is intercepted, while video-only recording is treated differently. Homeowners in Bethesda and elsewhere in Maryland should review current requirements and consider disabling camera microphones where private conversations could be captured without consent.
Do I need HOA approval before installing an outdoor security camera?
HOA or condominium rules may control where cameras, brackets, wiring, or related equipment can be attached, particularly on shared walls, façades, or common elements. Before drilling or running cable, review the governing documents and architectural-change process. Association approval can be required even when the camera itself complies with applicable state or local law.
Can I place a security camera inside a window facing outside?
Placing a camera behind glass can work in limited situations, but it often reduces nighttime performance. Built-in infrared LEDs may reflect off the window and wash out the image, while some motion-sensing methods can behave differently through glass. Test daytime footage, night vision, reflections, and detection performance before relying on an indoor-mounted camera for exterior monitoring.